Authentication is one of the most important part of your application. Most applications in modern times require the user to verify their identity before using the application. Basically, Authentication is the process of verifying the identity of a user.
Why do we need authentication?
- Handles security for the applications
- Controls access and privileges
- Verifies the identity of a user
In this article, I'll walk you through the process of setting up client-side authentication in nextjs with the help of nextAuth. By the end of this article, you will have an application where users can sign in using their Google and GitHub accounts.
Now you know what to expect in this article, let's move forward.
What is NextAuth?
- NextAuth is a secure and completely open-source solution for nextjs applications.
- NextAuth supports all popular databases like MySQL, MariaDB, Postgres, SQL Server, MongoDB, and SQLite.
- NextAuth also supports passwordless sign-in mechanisms.
Let's start building our application.
Initialize our nextjs application.
npx create-next-app@latest
This command will create a new nextjs application
Installing nextAuth
First of all, we need to install nextAuth in our application, run the following command in the terminal.
npm i next-auth
Add the API route
To use nextAuth authentication, we need to add a nextAuth API, to add the API we need to create a file called [...nextauth].js in pages/api/auth.

NextAuth will handle all the requests made to this API automatically.
Getting client Id and secret
We will need a client Id and secret from our providers to use the authentication services. In this tutorial, I'll be using google and Github only. you can add other providers too, the steps will be more or less the same.
Getting Google clientId and Client secret
- log into your google developer console https://console.cloud.google.com/.
- On the Dashboard click on create credentials and choose OAuth client Id.

- After that, you have to choose the type of application. In the case of a web application, choose web app from the dropdown.
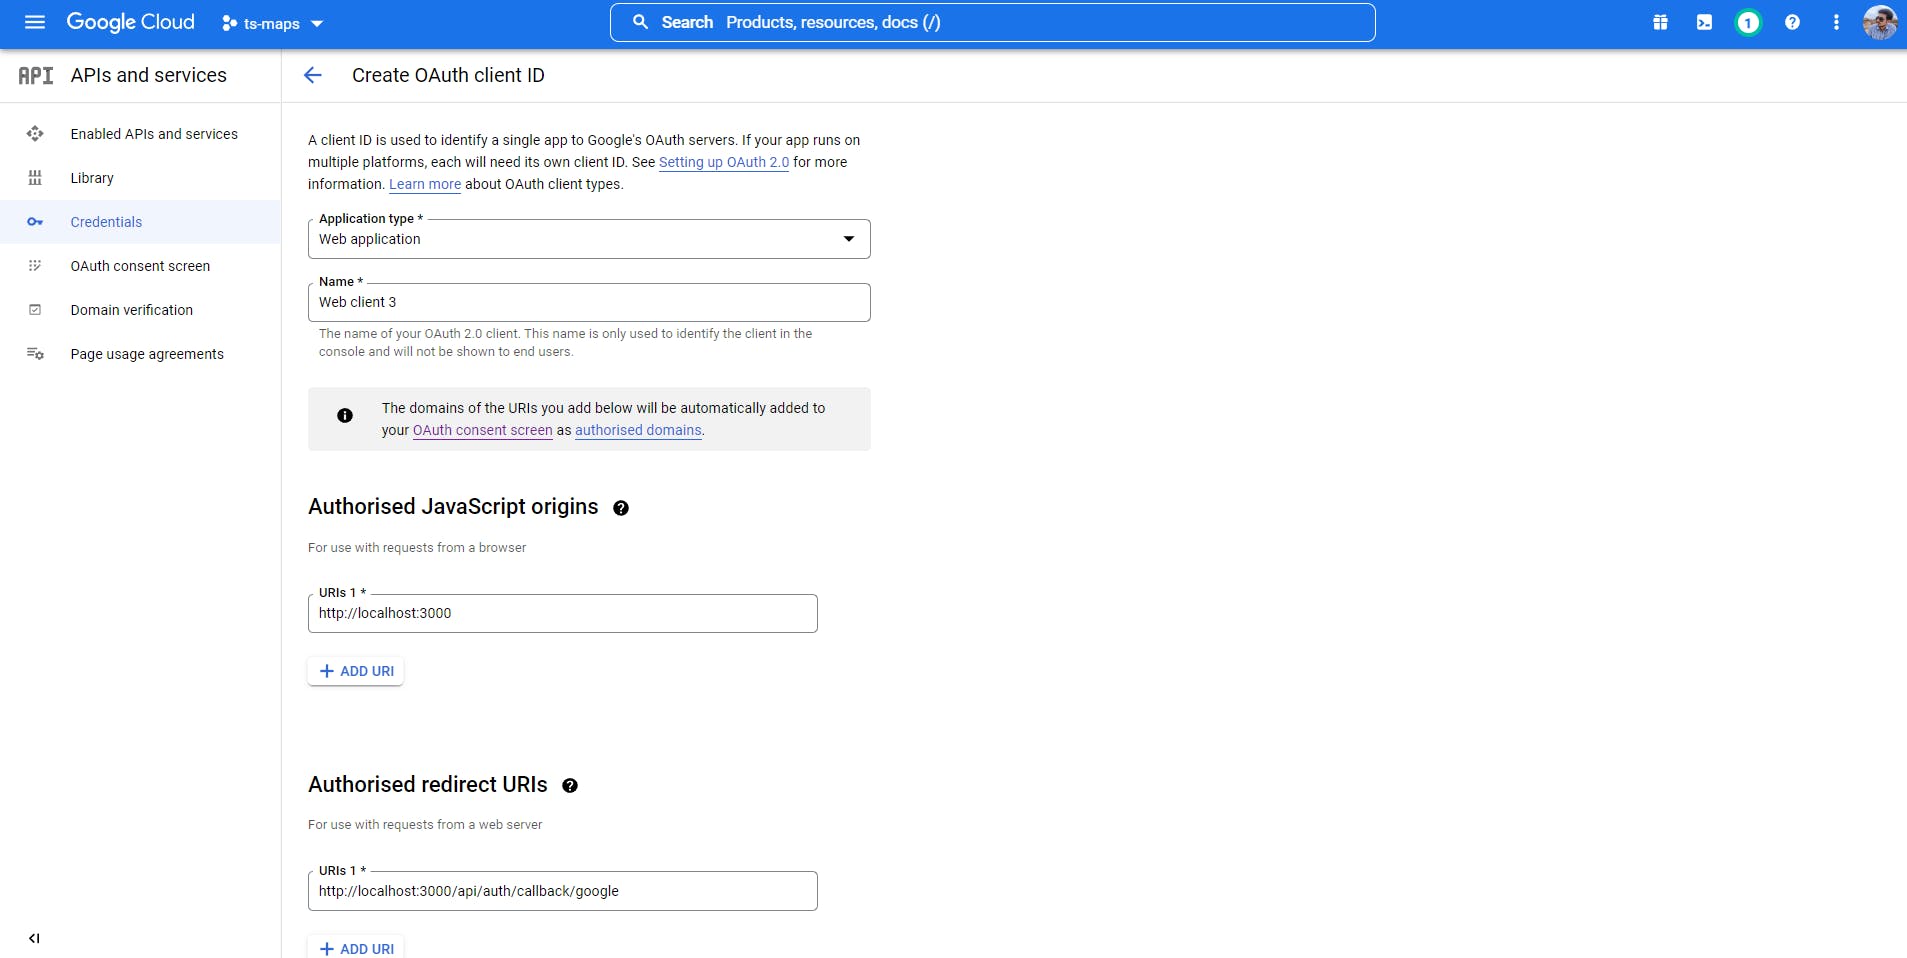
- In authorized javaScript origins, add the URL of your website.
- Now in the Authorised redirect URL we have to add [yourdomain]/api/auth/callback/google
- In this case, we are using this is development, so we can add localhost:3000/api/auth/callback/google
- After these steps, you will get a client Id and client secret which will be used in our application, save these for some time we will use them in some time.
Getting Github clientId and secret
- Register your new application on https://github.com/settings/applications/new
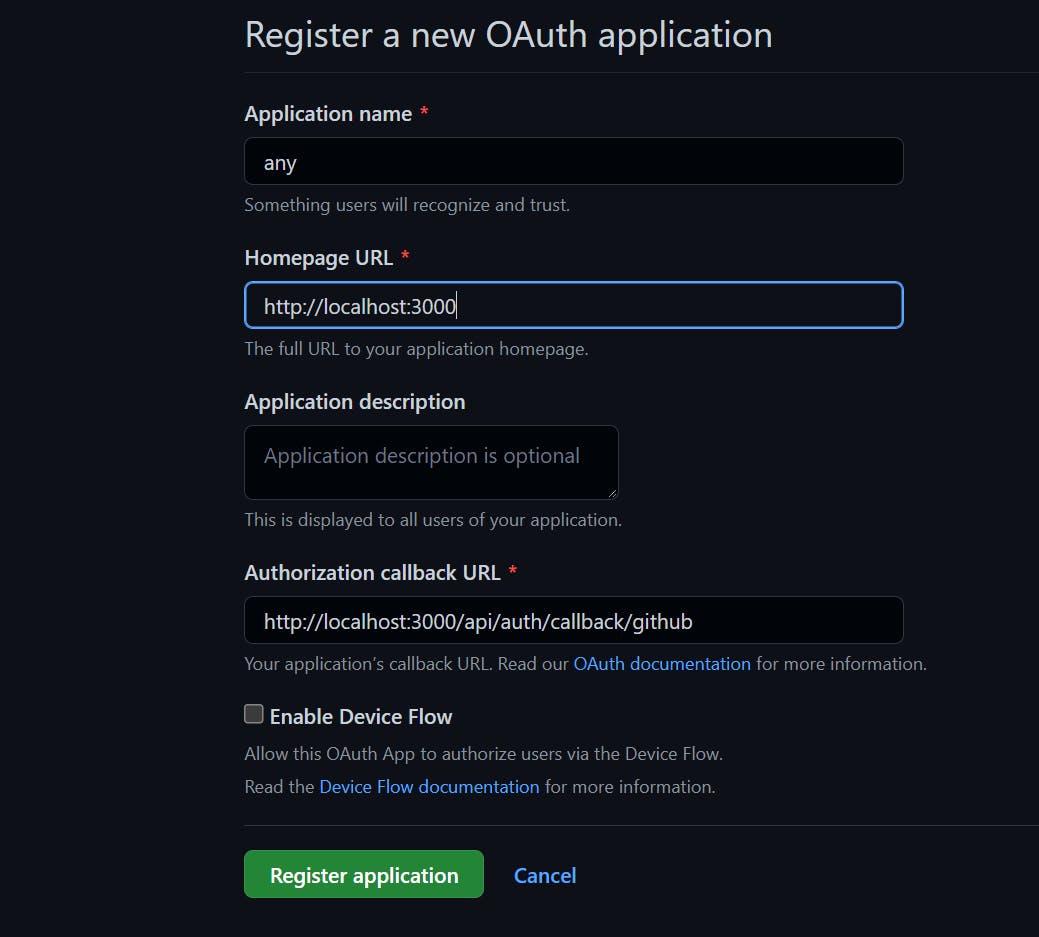
- Add the name and homepage URL
- In the Authorization callback URL add [yourdomain]/api/auth/callback/github . For development, mode add localhost:3000/api/auth/callback/github
- Now you'll get the client Id and secret.
Create a env file
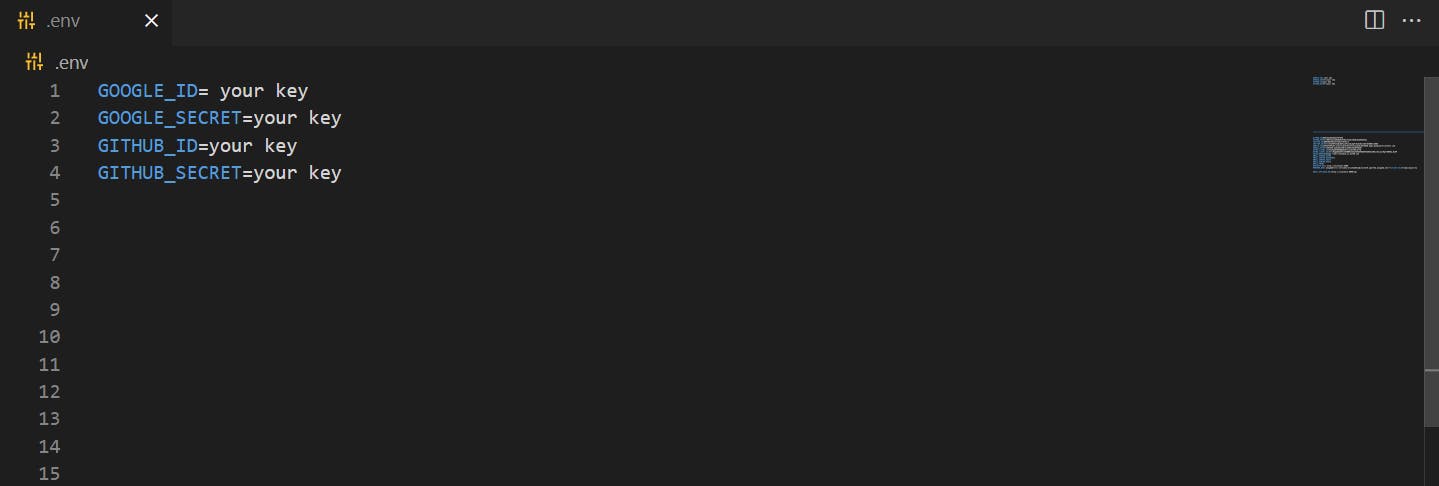
- Create a new file named .env in the root directory of your application.
- Save the google and github client Id and secrets in this file as shown below.
Adding the providers
- Add the Google and Github providers in api/auth/[...nextauth].js
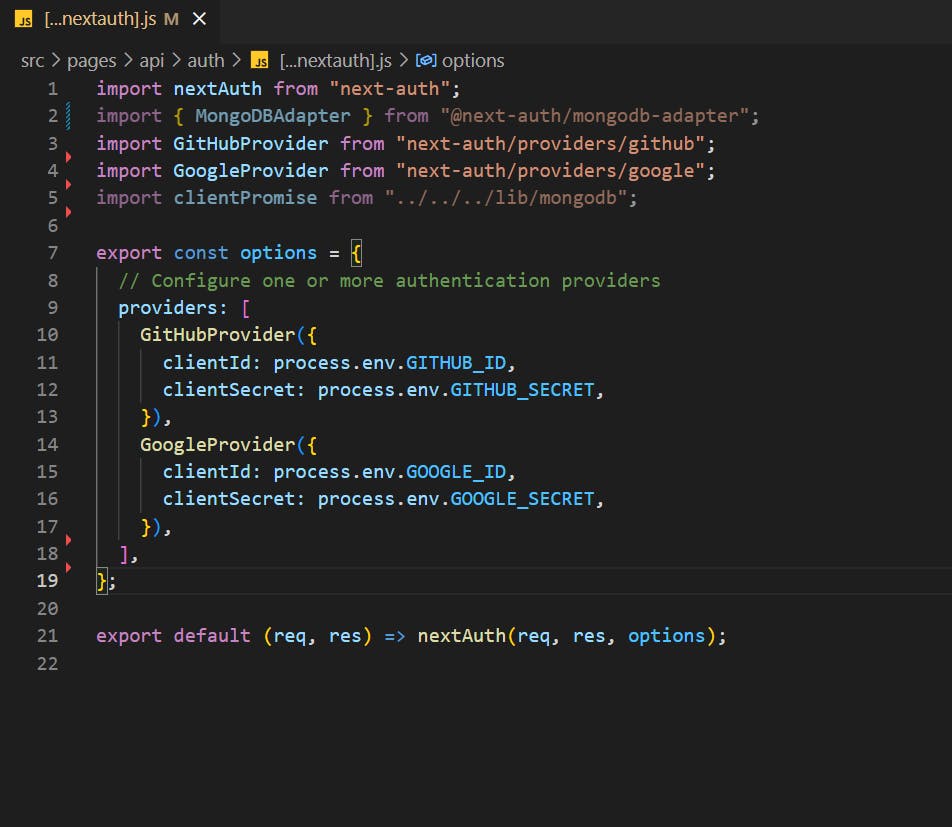
- After this step nextAuth is ready to handle the authentication for our application.
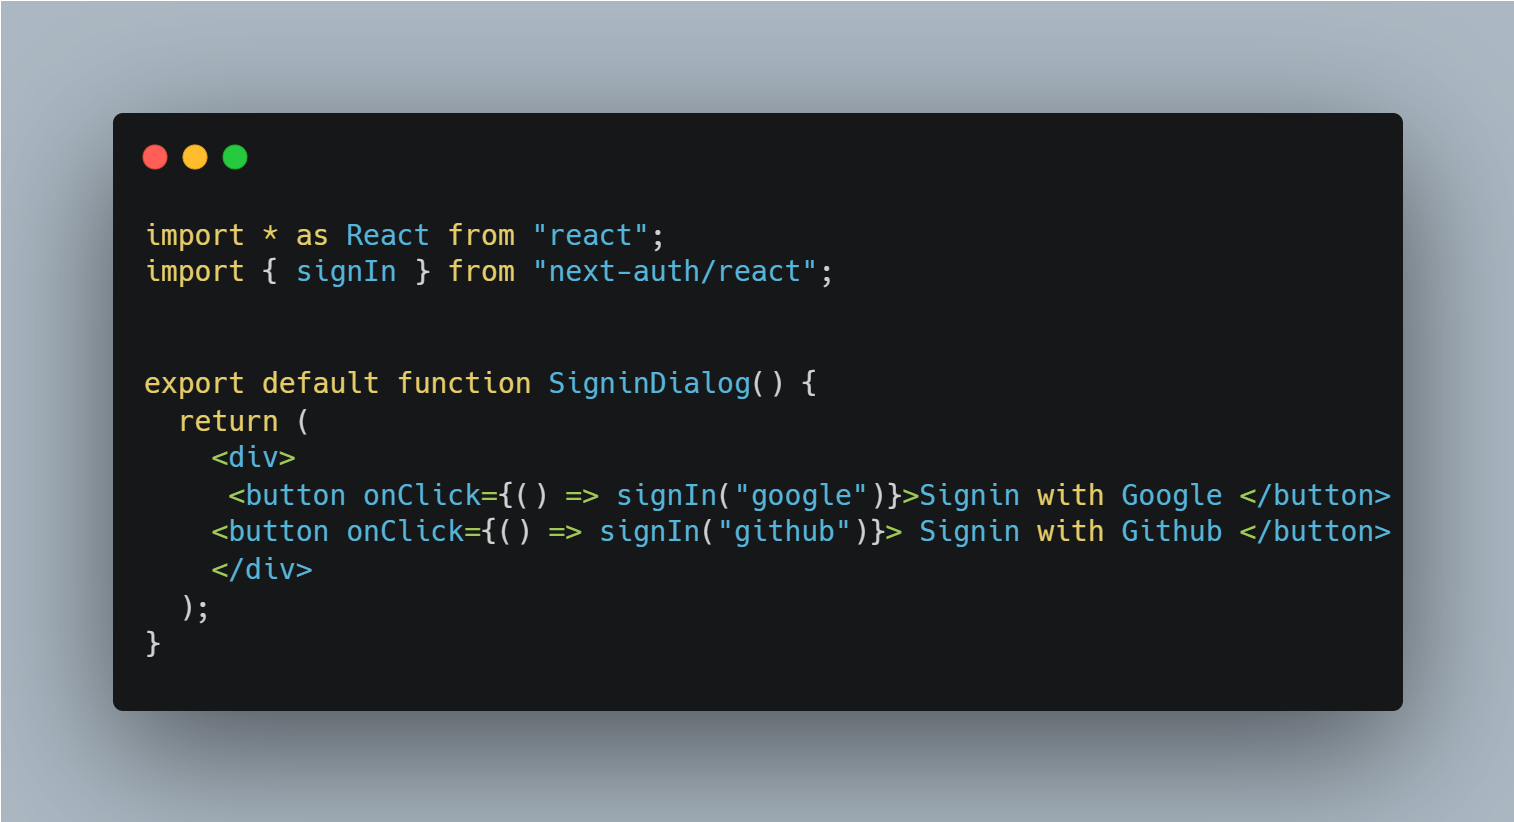
Creating a custom sign-in form
create a simple login form, it will have two buttons - one for google sign-in and the other for GitHub.
NextAuth provides us with a sign-in method, which will be used to sign in to different providers.
Different landing page for new users
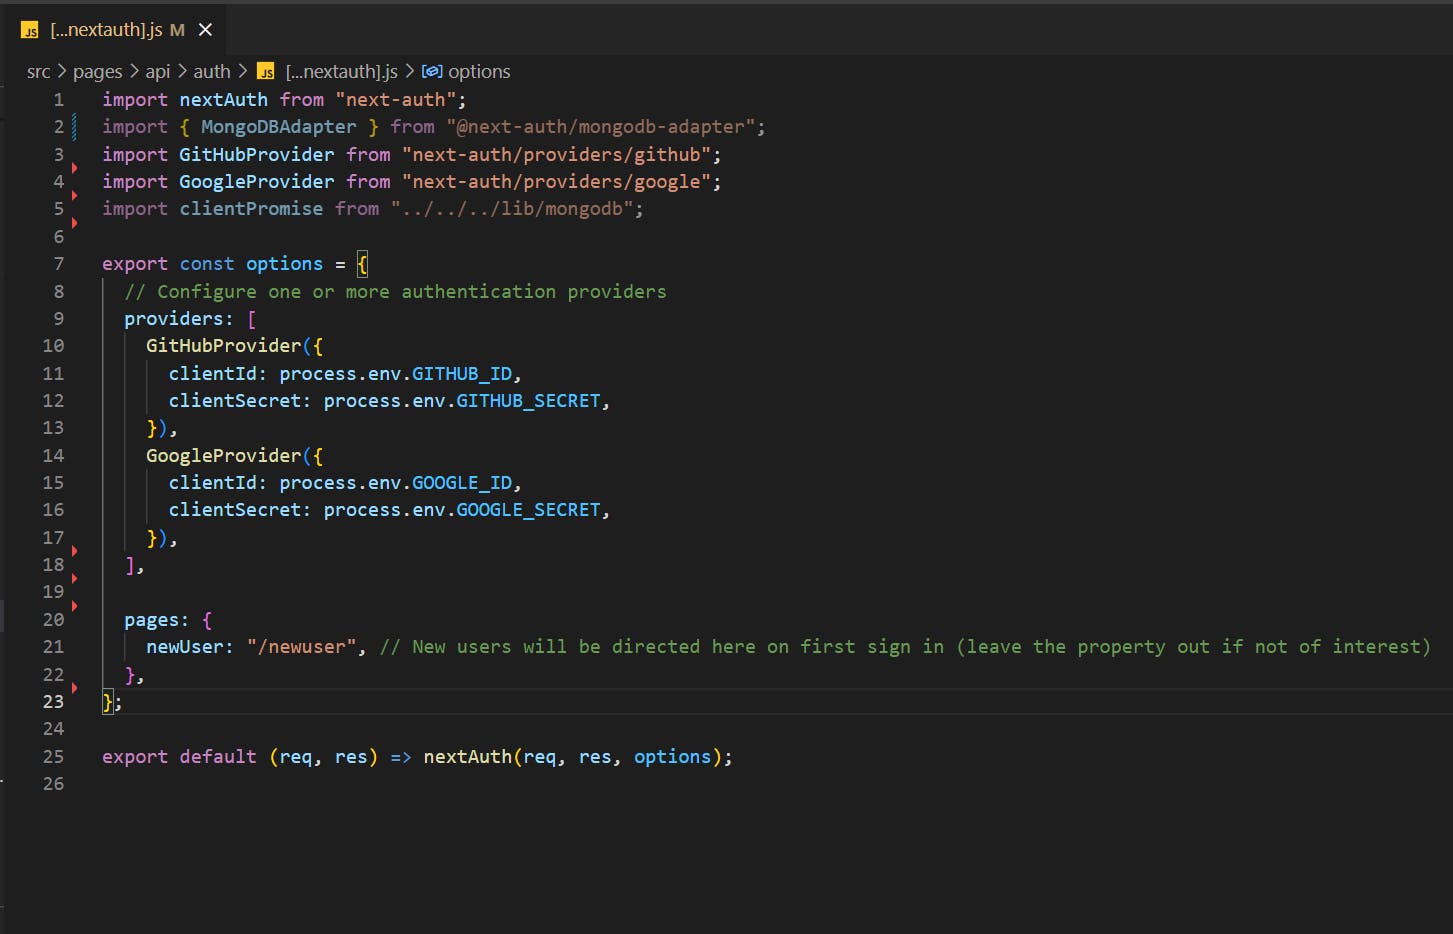
- nextAuth provides us a method to redirect the user to a different route if the user is new to the application i.e logging in the first time.
- To use this method, you need to connect your application to a database.
- Also, make sure that the page actually exists.
Done
That's it. Yes, it is this easy to implement authentication in your nextjs application, although there is a lot more we can do with nextAuth but this is enough to get started.
You can get more information on the nextAuth's official documentation https://next-auth.js.org
